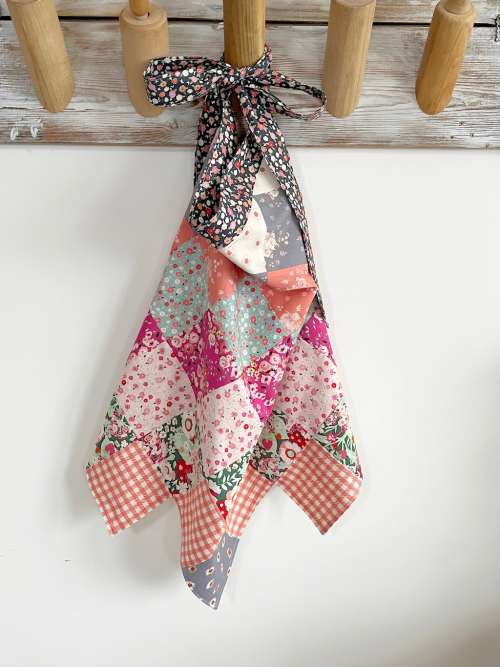
Hello my sewing friends!! I know you’ve been patiently waiting for me to get the Part Two of this sweet little Apron Sew-Along to you!
Before we get started on this second part of the apron sew along my Momma (Carol) is going to share the story of her Grandma White’s Apron:
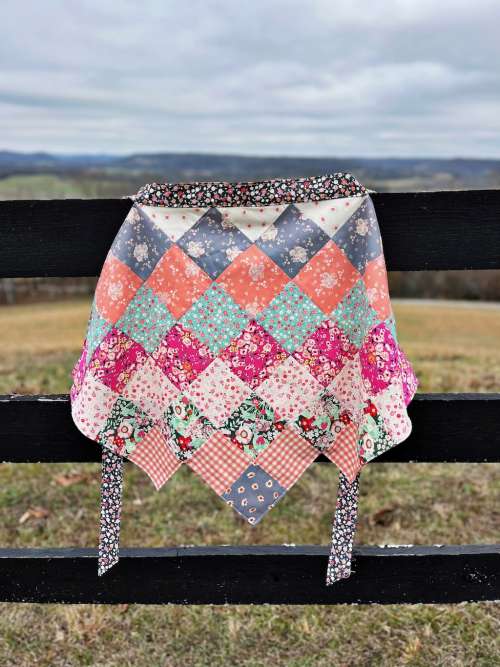
In 1943, at 6 years old, I was learning to cut 3 inch squares to make my first quilt… nine patch blocks with a solid square in the center. Grandma White was helping me and was also cutting her own squares, which she was sewing on an old Singer Treadle sewing machine, as we had no electricity. She was making an apron. I said “I want to make an apron too”. To which she replied, “Not yet!! You may think this is easy, but it isn’t.” I later learned that this apron pattern was her own design; and yes! It is a little tricky. I still have a worn and tattered old apron that she had made. ~ Carol
If you missed Part One earlier in the month, click here to find it!
Here are a few things before we get started today:
1). Please follow my instructions… it is going to seem very odd the way that the patchwork rows of this apron are being sewn together. Just don’t question the process and keep on going! I promise it will all come together in the end!
2). I failed to mention in my previous post that you will need a 30 inch square piece of muslin or other light colored fabric for the apron lining. You will also need a 70 inch by 4 inch piece of fabric for the band (you can use a fat quarter for this and piece the strips together).
3). An apron made with 4.5 inch squares is approximately medium to large in size. If you are small, you might want to cut your squares to 3.5 inches before assembling. (Also, you could even make this apron for a child by cutting those squares 2.5 inches.)
Okay so now we can get started!
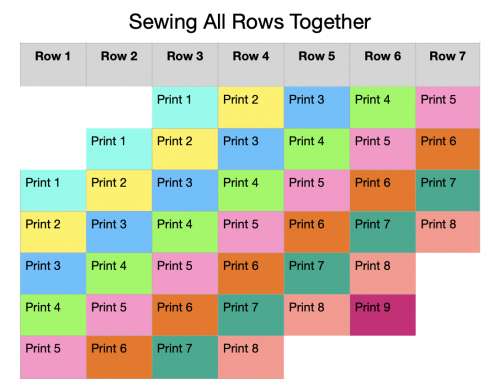
Step One: Get your nine sets of prints that you have preciously cut and labeled. Please follow the chart below on how to set up the prints that you will need for each row. Lay each row in a pile with the first print listed on top, followed in order by the next prints, then attach a label with the row number. This is VERY important.
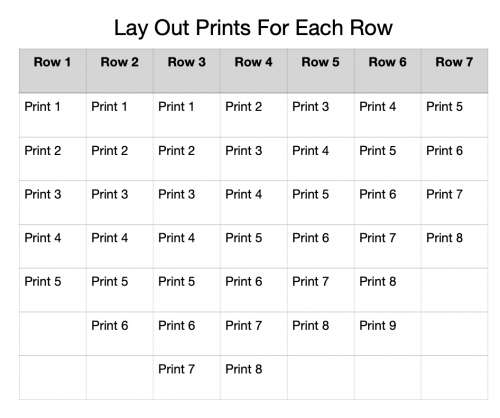
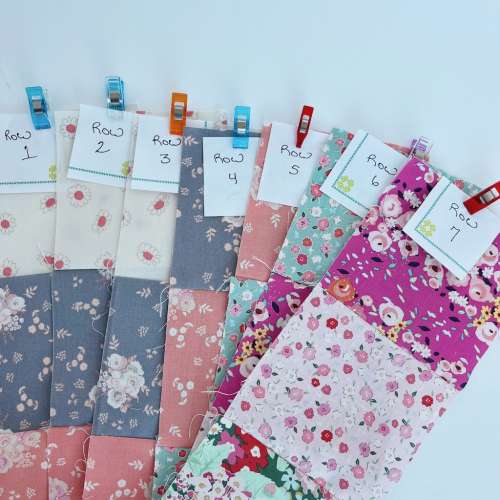
Step Two: Now we will sew each individual row. You will start with the first print in the row pile, sew to the second print, the third print and so on. (Keep in mind that none of the rows will be the same – follow the chart above!). As you sew each row, press the seams and then attach the label of the row number – this is very important.
Step Three: Now we will sew each row together. This is where it gets a little tricky. Follow the drawing below! Whatever you do, don’t overthink it… just sew them together according to my drawing! Keep it mind that it will NOT look like an apron!!
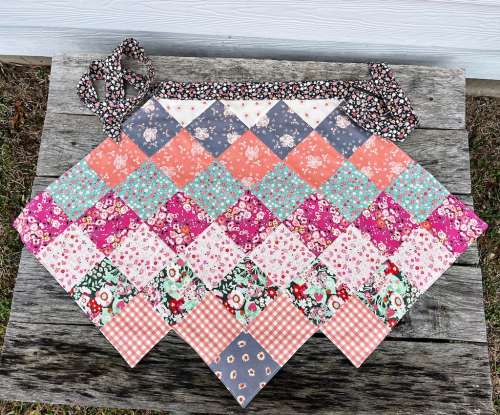
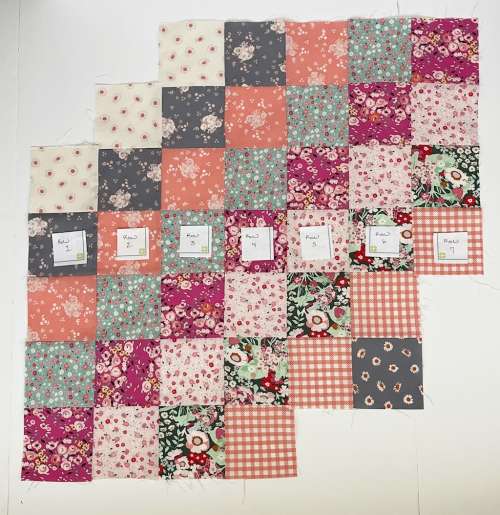
Step Four: Once you have all seven rows sewn together, your apron should look exactly like the picture below. If is does not, figure out where you went wrong and correct it! (I laid my row numbers on top for reference.) If you got it right, press all the seams until the apron is nice and smooth.
Step Five: Take your lining piece and lay your apron (right side facing down) onto the lining. Pin all the way around your apron. Do not worry about cutting your lining to the apron. We will do that later.
NOTE: My mother reminded me that Grandma White did not line her aprons. She bound the entire edge with a hand made bias binding instead.
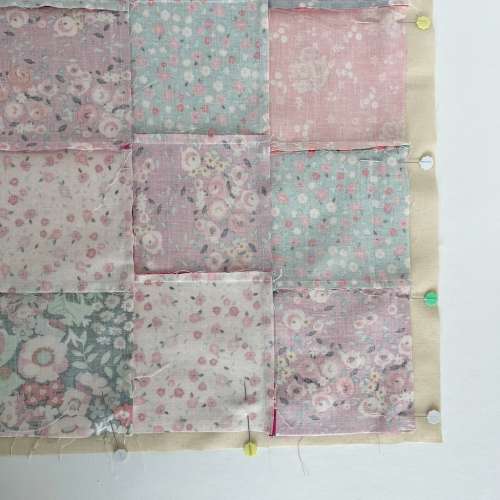
Step Six: Sew a 1/4 inch seam all the way around your apron EXCEPT for those top three squares. Leave that open… this is where you will turn the apron. (I marked an X on the backs of those blocks so I would remember not to sew them!)
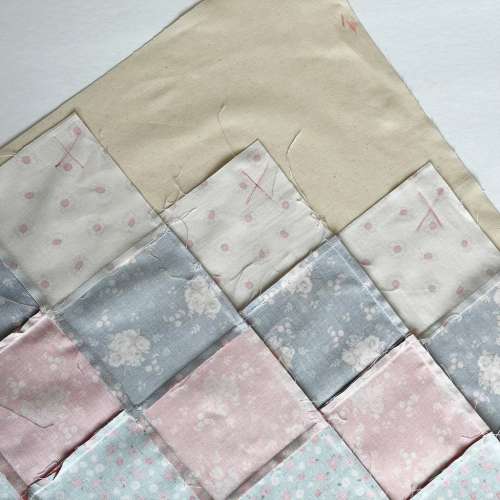
Step Seven: Trim the lining along the edge of the apron front. Do NOT trim the top three squares where we did not sew.
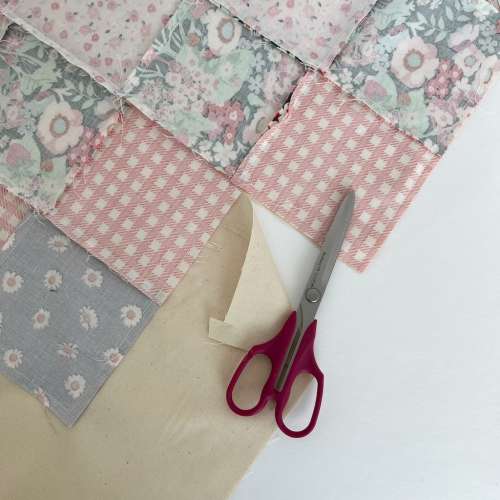
Step Eight: Turn the apron right sides out through the opening at the top, carefully pushing out the corners. Iron the seams until they are nice and flat. (Keep in mind the lining at the top three squares does not need to be trimmed yet!)
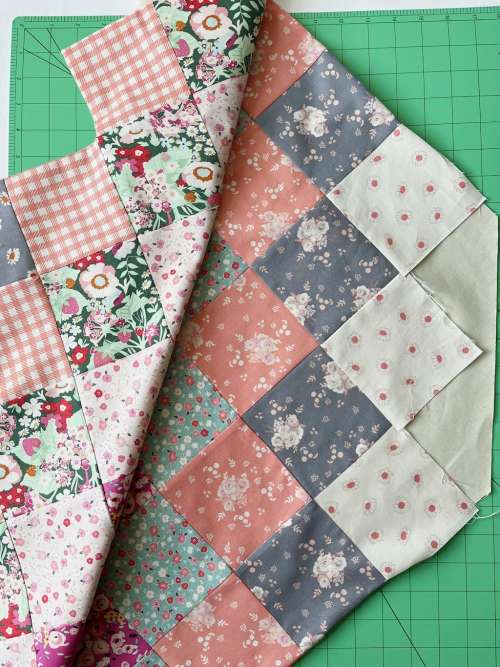
Step Nine: Top stitch 1/8 inch around the apron, stopping on each side of the top three blocks (in other words, do not top stitch them!)
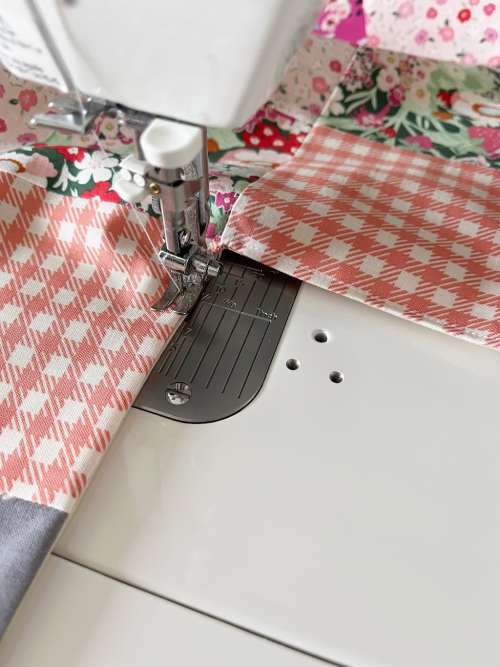
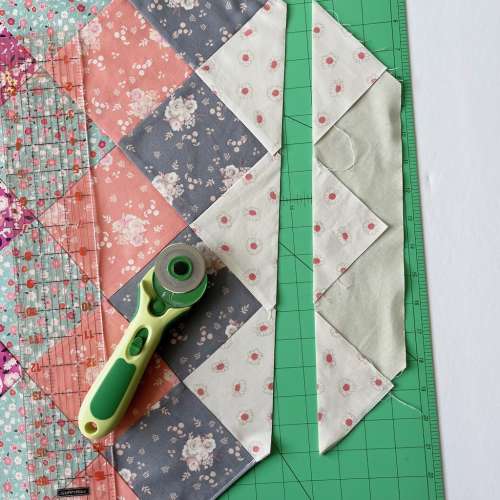
Step Ten: Make sure the apron is ironed very flat at the opening in the top of the apron. Lay your apron on a cutting mat and using a cutting ruler lay it exactly 1/4 inch (or a tad more) from the middle of those three squares. Once you have it exactly right, trim that top edge off. This now the top of your apron! (Is it making sense now?!)
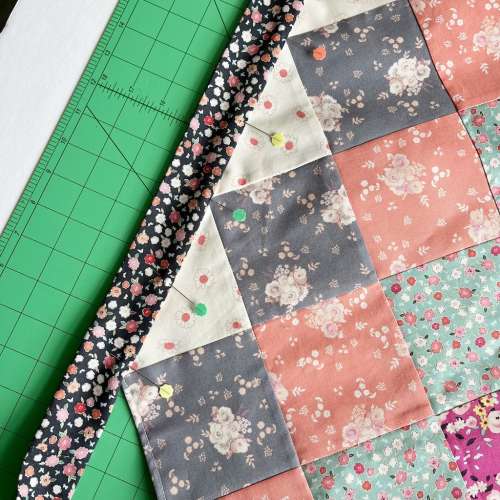
Step Eleven: Lets make the band and you will be done! Cut a 72 inch by 4 inch piece of fabric (piece small pieces together if necessary to make it long enough). Find the center of the 72 inch length and mark with a straight pen. From that center mark, measure 8.5 inches on each side and mark with a straight pen on each (you can remove the center pen now). Fold the band in half (lengthwise) right sides together and sew a 1/4 inch seam along the raw edges of the entire band, EXCEPT do not sew between the two pens. Remove the pens, turn the right sides out through the opening and press the entire band, including the 1/4 inch unsewn seam allowance. Place the apron top inside that opening in the band and take your time to pin it carefully so that the front and the back of the band completely encloses the apron top. Topstitch the entire band 1/8 inch along the edges, enclosing the apron. When you’ve finished sewing, look at the back of the apron to make sure the band has been sewn on the back as well as the front.
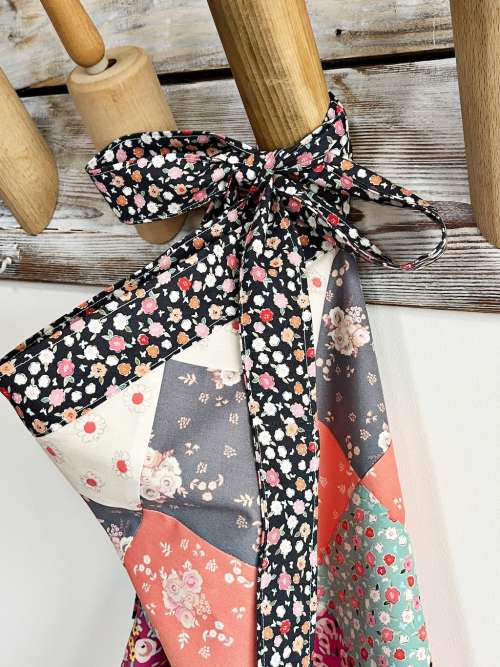
And oh my goodness!!! You are finished with your perfectly adorable Grandma White’s Apron! I would absolutely love to see your finished apron! Please email me a picture to: redfeedsack@gmail.com. Also, feel free to email me if you have any questions!
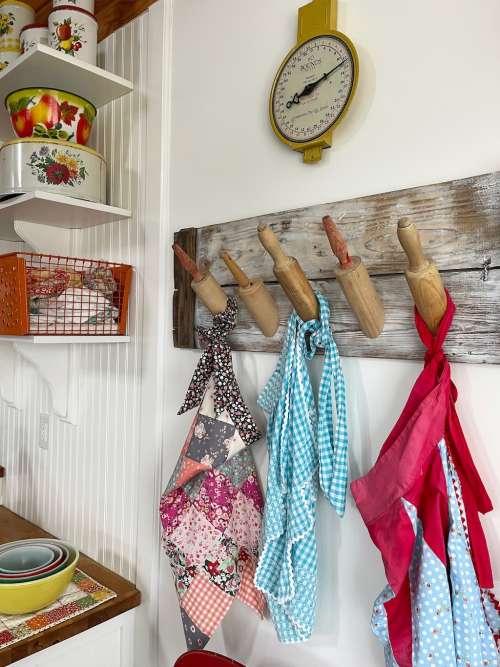
P.S. Do you remember this rolling pin apron hanger from MaryJanesFarm magazine??? I eyed that project for years… finally got the courage to make one a couple summers ago and oh my word do I love it!! It’s actually probably one of the most asked about DIY projects in my house! I wrote a post on mine here on the blog a couple years ago (you can find that by clicking here). And if you’ve never made one NOW is the time!
Until our gravel roads cross again… so long!
Dori


I absolutely love your posts! Your project style is perfect for me. I have just moved into a new house my husband built and can’t wait to craft some of your projects. We are way Downeast on the coast of Maine. We grew up here. We love it! We were lucky enough to spend a winter in New Mexico and would love to visit again. Enjoy the New Year.
Hi Joanne! How special to be moving into a house your husband built! My husband and I built our home too and it is such a special home because I know every single nail that went into it! (As well as the blood, sweat and tears… literally!). Congratulations!
~ Dori ~